The 3D printer has been on fire for many years, but there are still not many friends who seem to play around or apply it. One year ago, the company that knew friends had a very famous Makerbot Replicater 2X. The saliva at that time was almost as endless as the rivers, but it was a pity that the price was there.
In constant communication with friends, there is also Google (a non-existent search site). It is known that 3D printers are already open source, with powerful and easy-to-use Arduino motherboards, and a powerful RepRap community. Having seen various finished printers in Ma Yun's home, I thought that for DIY's own machine, I started to grow grass. With her own birthday soon, the Queen's family at home did not have to spend much thought to save time (the Gemini Queen's adult said that I am not impatient of Virgo...) Preparing a birthday gift for me, so I had my budget approved.
In the beginning, the goal set for yourself was the print volume of 200,300,200 (length, width, height) and the design of the twin extrusion heads. The same configuration of products in the Ma Yun home search is generally 4xxx-8xxx have, even more not include this tall product on the MakerBot. I have also strengthened my determination to build my own machine. This sharing is mainly about explaining your own design ideas. The details of the details are already available on the Internet. They also need to be developed according to your own needs and budget.
A mechanical frame
Second, control circuit, electrical
Third, buy buy, assembly, debugging
Fourth, the status quo
V. Various pits...
Six, reference materials
Seven, conclusion
The current 3D printers are mainly two large branches, a linkage arm structure based on a Delta coordinate system, and an XYZ structure based on Cartesian coordinates. The former represents Kossel/Rostock. As for XYZ Cartesian coordinates, there are too many branches. Friends who are interested in studying can go to RepRap to understand. There are also many forums in China. Due to the delta structure's high requirements on the precision of the linkage arm, the oversized fuselage is likely to cause twisting deformation. I was rejected, and I still like the square sense of pride of the XYZ structure.
The framework and structure determine the overall strength and stability of the machine. In this step, I spent almost two months (idle time, after all, still working people ah ...), and constantly communicate with friends. As well as searching the Internet for information, modify your own design.
The initial idea was to compare and compare the current structure of the more popular RepRap Prusa i3.
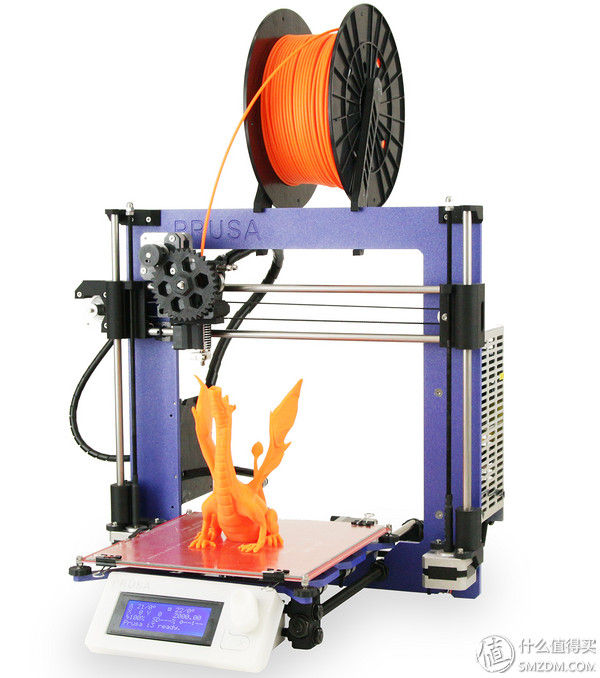
But for a Virgo woman who pursues (bi) beauty, the strength of the acrylic frame is to cope with the weight of two extrusion mechanisms (extrusion head, heating part, stepping motor, up and down 800g). A little powerless, and finally chose a cheap and large bowl of aluminum.
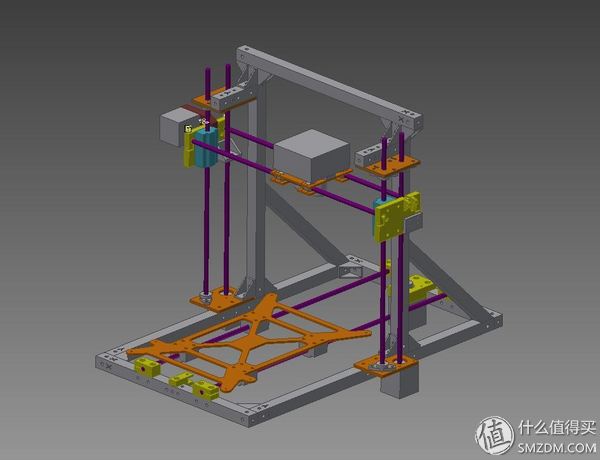
But it didn't take long for this first edition of the map to be completed, and my heart changed again. Now that we have done so much, why not make a complete framework, plan with strength, and even be able to do a simple milling machine later? I think too much). As a result, he took the spare time and made the second version of the design.
This is the most basic XYZ structure, but the biggest concern is that the printing platform has to withstand 2 sets of extrusion structures, as well as XY axis of the stepper motor, the overall moving weight (more than 1KG) is relatively high, taking into account the inertia , is not conducive to the rapid movement of the print head. So have been doing weight loss design around this version.
One day, while continuing to find inspiration on the RepRap forum, a new mobile structure, CoreXY, and a spin-off 90-degree CoreXY Respin were discovered. Its principle is that the two motors control the movement of XY at the same time. When the two motors are in the same direction, the two motors move to the X axis and the two motors move to the Y axis in the opposite direction. The simultaneous action of two motors is more stable than the control of a single motor, and it also reduces the weight of one motor on the XY platform.
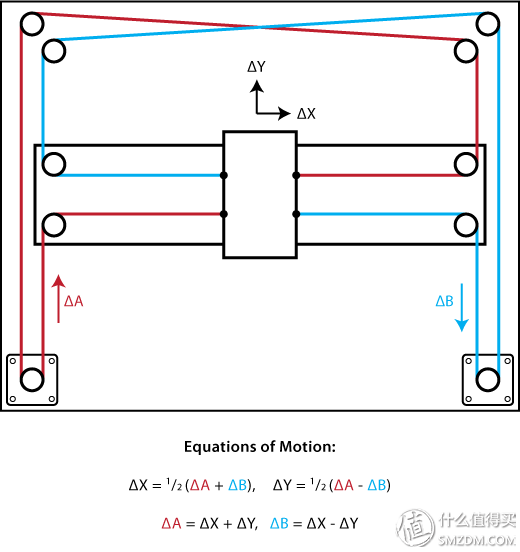
CoreXY Respin is also a CoreXY variant found on the RepRap forum. The key is to adjust the position of the two motors and the left side of XY by 90 degrees. For my big box with 200300 print area, I really saved a lot of space.

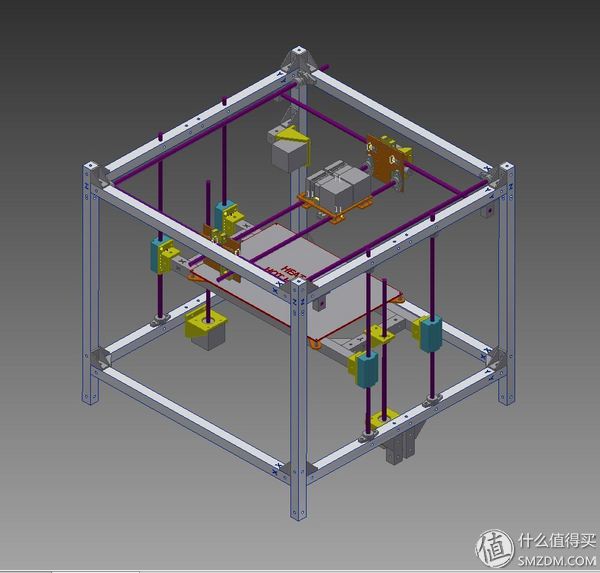
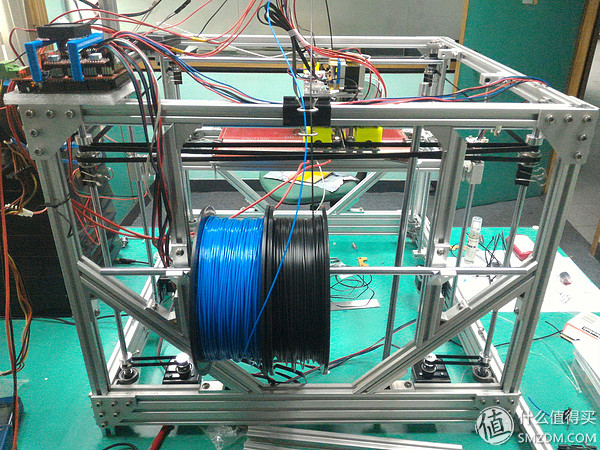
So, change, change, change, and change (Party, you don't run, I promise not to kill you), the third edition comes out again... Because we have to consider the output space of two extrusion heads, and possibly later In addition to the automatic flat bed or other weird things, the entire frame has a projection area of ​​550550, a widened 2060 aluminum profile for the bottom circle, and taking into account that the 2020 aluminum profile may shake, the frame is added 45 degrees to all three sides. Strengthen support.
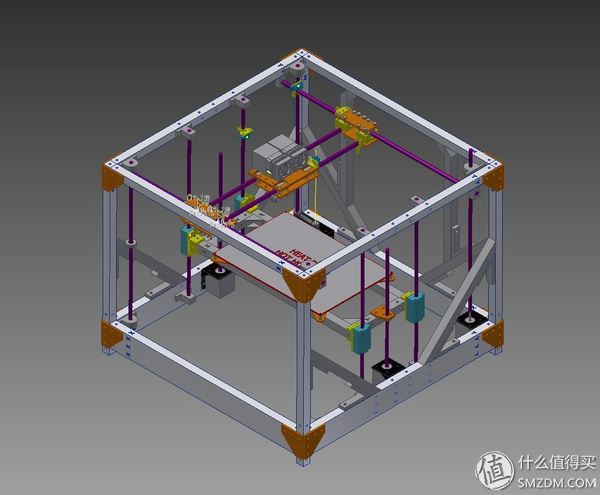
Then constantly scrutinize the changes, and Chad has been determined to use this as a final draft. Later, I talked to a friend who was doing furniture design. The advice I got was to “do it! Do it decisively! Since there are keynotes in the manuscript, first do it and improve it. It's perfect if no product comes out.â€. Sure enough, KuBi's Virgo is a turtle hair star...
Second , control circuit, electrical partIn the mature open source environment, the control circuit part is not difficult. Arduino-based RAMPS (expansion board) is also under the strong production capacity of the people, the cost dropped to 1xx on a set. The core part is solved without any difficulty.
The core circuit control part, I personally recommend using the Maker base MKS2560 kit (which is really not advertising), my consideration is as follows:
To solve the kit, Arduino + RAMPS, and the motor drive module together.
The MKS 2560 is an improved version of the Arduino 2560. Compared to the public version, it has added a self-healing fuse and is not afraid of connecting the wrong cable. (On the day when I installed the machine, my friend told me that his public version was 2560 because of the short-circuit smoke...)
The MKS 2560 supplies power to the Arduino directly via the RAMPS mainboard. When the computer is not used for offline printing, the 5V power supply to the Arduino board is not considered.
Not choosing a motherboard such as Melzi or Rumba because it is necessary to consider upgrading Arduino DUE + RAMPS-FD with improved computing power. Now the kit can at least split the Arduino part and perform other functions independently.
The choice of stepper motor, taking into account the XY axis to withstand relatively large power, chose a 48mm NEMA17 stepper motor. As for the Z axis, more consideration is given to the standing moment, and a relatively large 42 mm NEMA17 stepper motor is enough. The stepping motor of the extrusion structure had to choose the 42mm NEMA17 stepping motor because of the weight problem.
Power supply is also a problem that needs to be considered, mainly the power of the hot bed demand is not small. Since I use a 200300mm hot bed that is larger than the average (mostly sold) size, 250W switching power supply for general computers (yes, I just removed from the P4 desktop in the warehouse for savings) , A wiring will automatically overload protection, but had to prepare a 350W 12V switching power supply to serve.
Third, buy buy, assembly, debuggingAfter the design draft, it is the most refreshing process of buying, buying, buying, and buying goods.
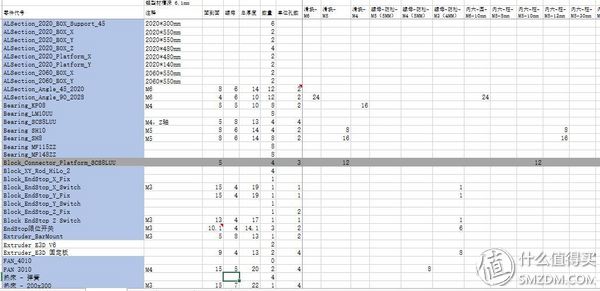
First of all, in the design, as far as possible the details of the parts are made, and then you can generate BOM (this is a good habit), according to the table to buy things. This is part of my own bill of materials, which has as much detailed data as possible, from the part name designation to the size, and the size of the nut screw. Although after making the machine, it is still necessary to constantly modify it and buy and buy all kinds of small screws. However, because of the BOM, at least when I bought the first round, I didn’t miss even one. Screws.
Many shops in Ma Yunjia provide one-stop shopping for 3D prints. Search keyword "3D printing E3D" sales in the first row of the few that are basically able to buy what they need. Unless it is something of a strange size or special material, such as carbon fiber linkage arm, these need to climb the forum to climb Ma Yun.
Screws and aluminum profiles also have a lot of stores in Mayun. They use the keywords “2020 Aluminum Profiles†and “Hexagonal Screws†and the like. They are also ranked by sales volume. Basically, Tmall's are reliable.
In particular, when talking about aluminum profiles, don’t even think that the province’s money has been cut. Tmall’s various specialty stores, whether straight or diagonal, are able to do dimension drawings, and they can also It is clean and free of glitches, and the error is very small. I personally feel that I can solve the very good things with money (a reasonable price) and simply outsource it to a professional.
In fact, the assembly and debugging has not been difficult here, because when designing drafts, a lot of size data has been set. When the material arrives, it will be like screwing a lego like a Lego and screwing it up on its own design draft. Then he will have to buy a power tool. (Read Fractal1's series of works and the poisoning of the tools!) ..
Regarding the setting of the firmware, stepper motor current adjustment, temperature control, leveling, debugging of various details, basically every article can open a new article of experience, but for my writing pains, it is recommended to use Powerful Google (recurrence of non-existent websites).
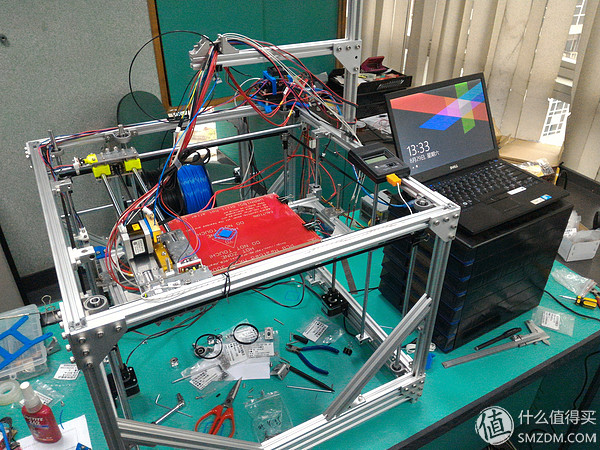
This is the current state of my finished product, and there are many details that need to be improved. For example, the second extrusion mechanism needs to disengage the stepper motor, transform it into a gearbox structure driven by a flexible shaft, and the most troublesome cable finishing.
A messy desktop, a variety of tools are placed in a smooth (actually lazy) position ....
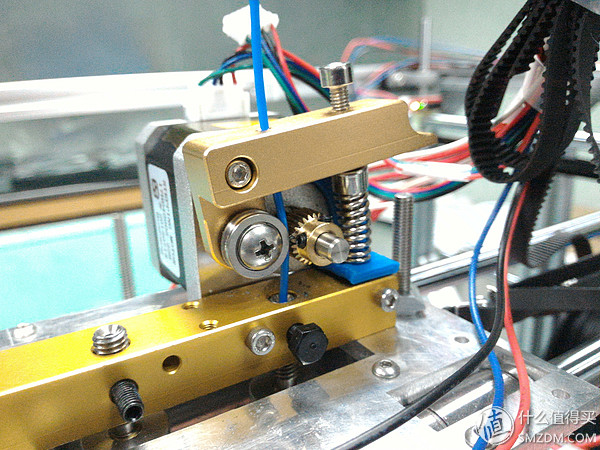
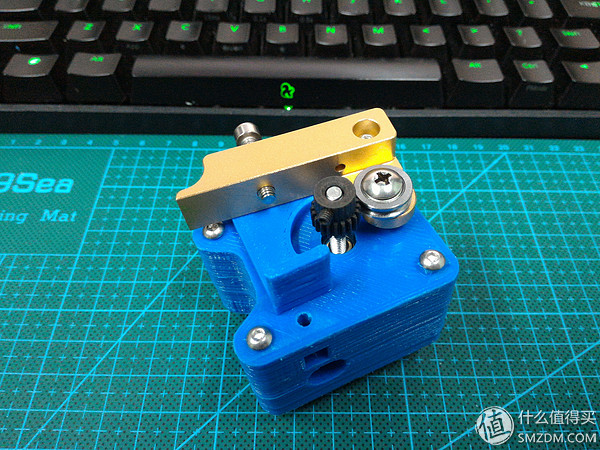
The first extrusion mechanism in use
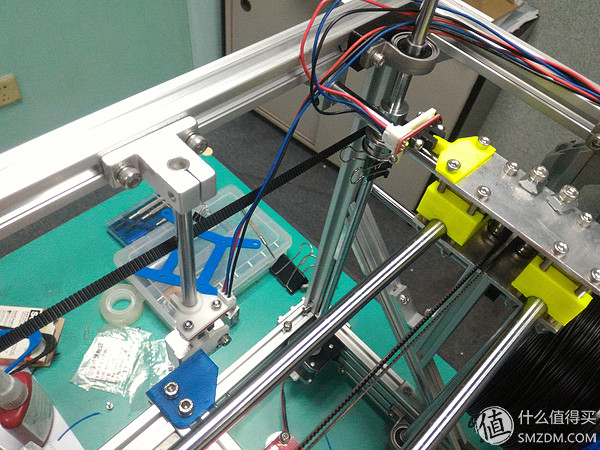
Temporarily empty squeeze out the second extrusion mechanism and wait for its own gearbox design.
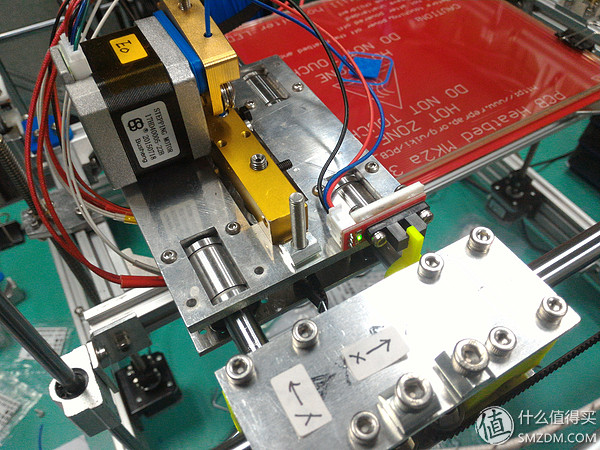
All Endstop switches are photoelectric and guarantee accuracy.
The core Arduino and RAMPS expansion boards have not yet finished the messy cables. They have already printed out the mounting bases, but they also need to solve the wiring lengths of the heaters of the extrusion mechanism (thick four red lines in the figure).
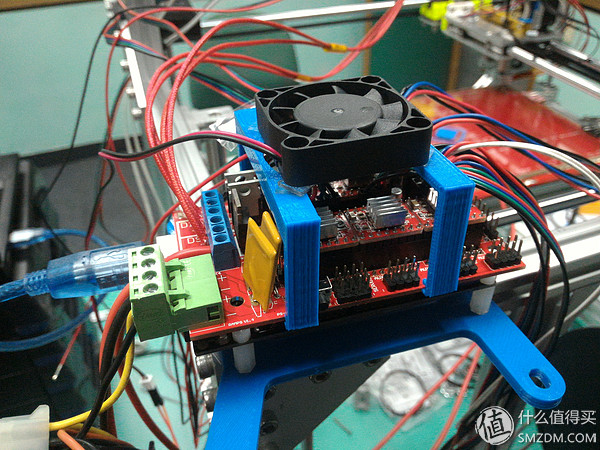
Dual power supply, the right desktop switching power supply is responsible for the power supply of the main board, extrusion head heating, fan, and stepping motor, and the left 350W 12V power supply is independently responsible for hot bed power supply.

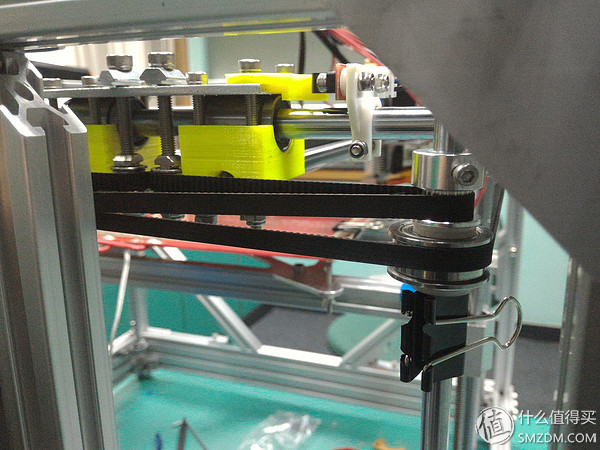
One of CoreXY's driveshafts is concentrically designed with bearings. The upper and lower belts are free to move without affecting each other. Fishtail clips are also a good tool...
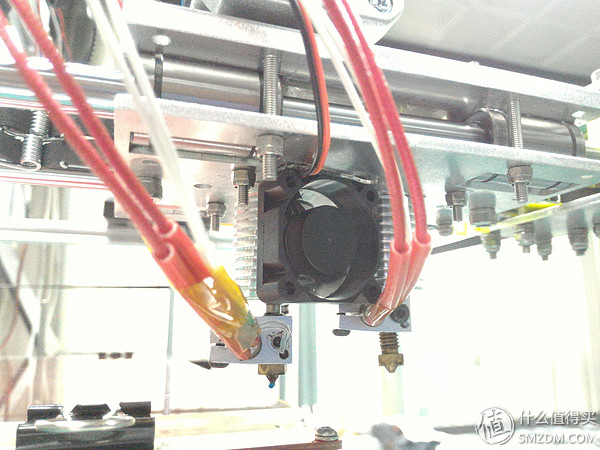
From the bottom up, the extrusion head uses the E3D structure to enhance heat dissipation and reduce the chance of plugging.

The fan was not directly attached to the heat sink in the usual way. Instead, the 3M VHB double-sided tape was applied to the bracket to prevent fan vibration from affecting the print head.
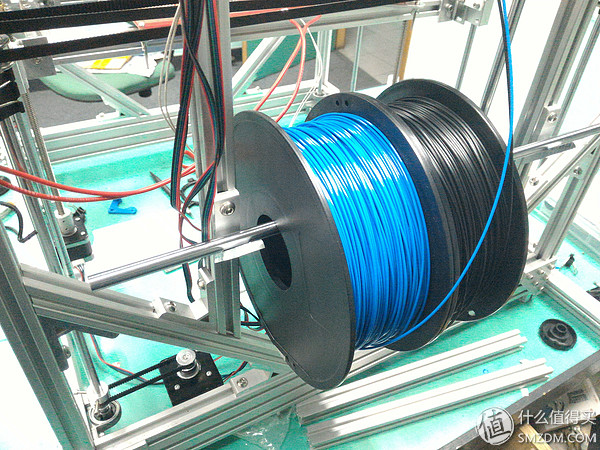
The material behind the shelf, a straight shaft bracket, do not have to do another bracket, and lazy
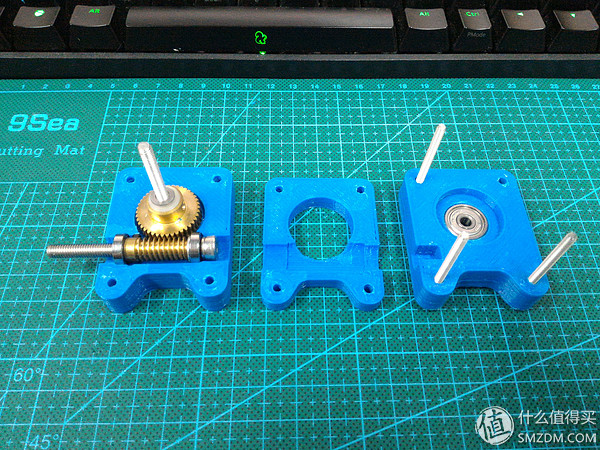
The worm gear box that is still in trial is more than half lighter than a 42mm stepper motor and it has a light weight tool.


The recent working status, because of the small space, can only use the mobile phone to capture the slag video. Looking at the machine layer by layer to "stack" things out, there is still a sense of accomplishment.
It's not a pit, it's just sharing your own experience and the detours you've made. These are not problems that adjustment can solve...
Learn! Learn! Learn! - This is the most important thing. Why start from scratch, because from the very beginning, my own understanding of the world of 3D printers is 0, probably also know the basic principles of FDM. Through Google (how old to mention this non-existent website), refer to foreign pictures and the structure of finished products, and use their limited English reading ability to see the various discussions of RepRap above various contrasts, of course, domestic (including Hong Kong, Macao and Taiwan) In order to achieve the understanding of the concept and details, the basic working principle of the entire printer is in the heart. Then, based on the mechanical knowledge that he learned at college and had not returned to the teacher, he designed his own mechanical framework. It also taught Autodesk's Inventor, and the basic modeling and assembly functions were sufficient. (Actually, the university's ProE and SW have forgotten all about it, and Autodesk has 3 years of student authorization to try the full version for free.
direction! direction! direction! - When designing, you must decide on the structure of what you want. Each structure has its own advantages and disadvantages. For example, the fast but excessively high body twist caused by the Kossel/Rostock of the Delta structure, or the traditional XYZ structure is stable but not fast (relative to Delta). How much to do, how much to do. For example: The size and acrylic structure of Prusa I3 can be economical, but it also determines that it cannot be done quickly (in the conventional case).
Design time details! detail! Details ! - Learn as much detail as possible during design and make it in the design software. BOM, in particular, is very useful for late material procurement. Especially for the screws of different types, diameters, and lengths used for different parts, when this machine was first purchased, there were a total of about 56 (unwittingly so many) different nut screws. Make a record of it.....
Cable length - Generally available on the market, the main consideration is 200200 Prusa construction machines. The cable length will only be a relatively small Prusa reserved length. Because the frame is too big, the area of ​​550550mm, the problem of cable length appears. No matter whether the extrusion head mechanism (heating, temperature sensing, motor) or the hot bed itself, the cable must be lengthened.
Bearing pre-tightening force - originally thought that 8mm diameter bearings can be installed on the 8mm optical axis, and found that there is a preload force of this thing, the same size of the bearings need to be heated by various means to cause slight "heat expansion "Can only be put into the optical axis, but once set in, to adjust the position, or to remove it, it would be troublesome, and it will not be the whole axis into the fire to roast it ... ...
The quality of the material - The PLA on a certain treasure is already all over the place, but the quality of different shops is still biased. Poor quality consumables have impurities, bubbles, and non-uniformity, which ultimately results in unsmooth extrusion and even plugging of the extrusion head. I bought the first volume of consumables. All the above problems were encountered. I almost discontinued my print head...
The necessary cooling - most of the plugs, except because of the material itself, the biggest reason is because the material in the wrong place is heated to expand but not the melting point, and then ... blocked. Therefore, in addition to the nozzle part of the most terminal, as well as the hot bed itself, heat dissipation is very necessary, please refer to the blogspot article below, of course, is to scientifically surf the Internet...
Six, various references
Main Design Software: Autodesk Inventor
RepRap Open Source Wiki: Link
CoreXY Structure Principle: Link 1, Link 2
Taiwan's Blogspot (link), there are many places to pay attention to the installation and use of 3D printers, to be honest, can be much better than the domestic can search
Seven, conclusion
Tossing down, the approximate cost of this machine is around RMB 3,000, which is definitely more expensive than buying a Prusa structure at Ma Yunjia, but it is cheaper than the finished double extrusion head machine, and the performance (print area, speed) is also higher. A section. And it also makes sense to learn a lot of knowledge in the entire process.
A 3D printer is not just a toy, but a tool, a tool that can help you more easily implement bizarre ideas. Tools are dead, people's ideas are the key.
This article only gives a rough idea of ​​how to design from scratch and experience in the installation process. Specific details still need to search and learn on their own, and hope that interested friends can successfully build a 3D printer of their own.
------------ The dividing line of the full article -------------
------------ The following is an appendix. At this point, I've successfully made a bit of a meaning. -------------
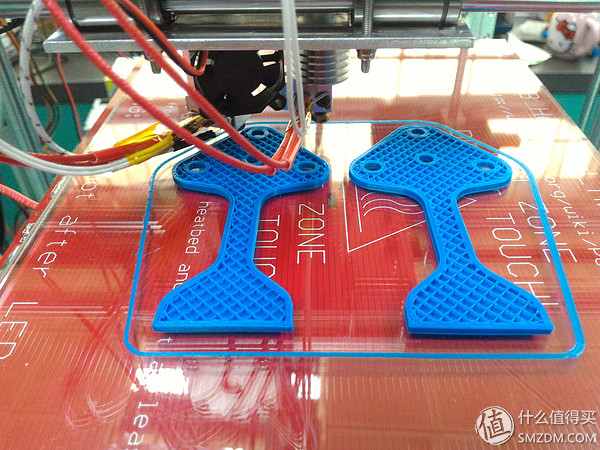
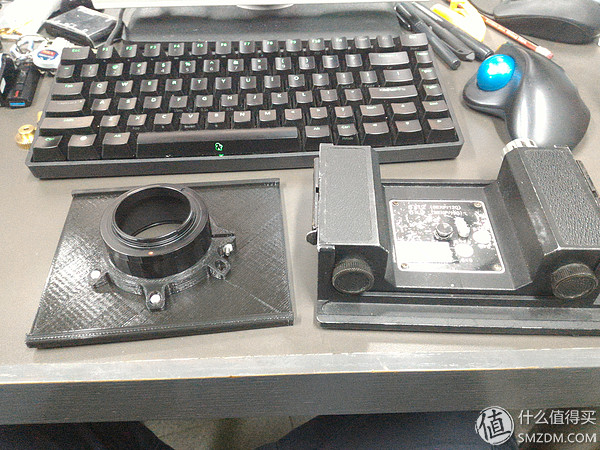
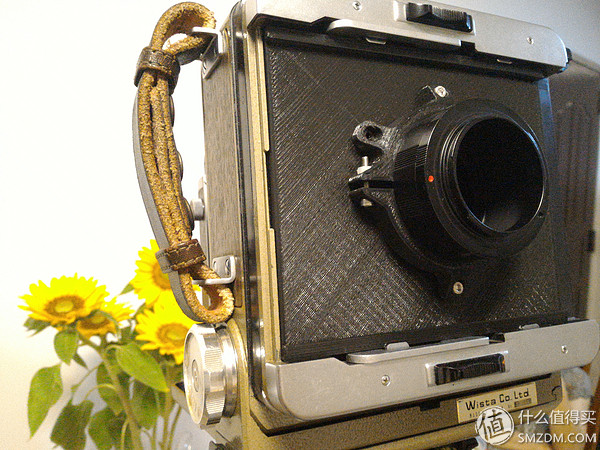
Attached... Since you have a 3D printer, most widgets can do it yourself.
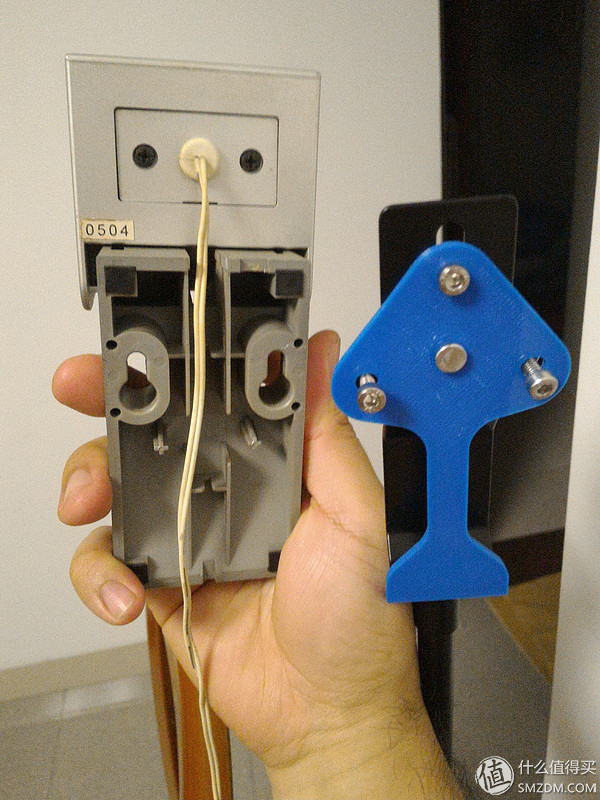
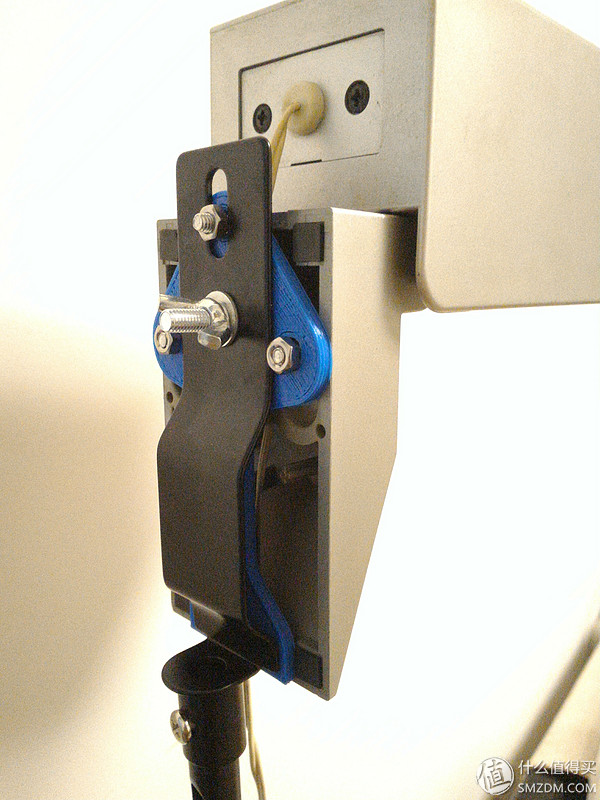
Satellite audio installation
However, X's 4x5 adapter to the Sony E bayonet, compared to the 4x5 area, 135 full-width stamps, but just try to play it out, you can switch 135 as a telephoto to make use of it.
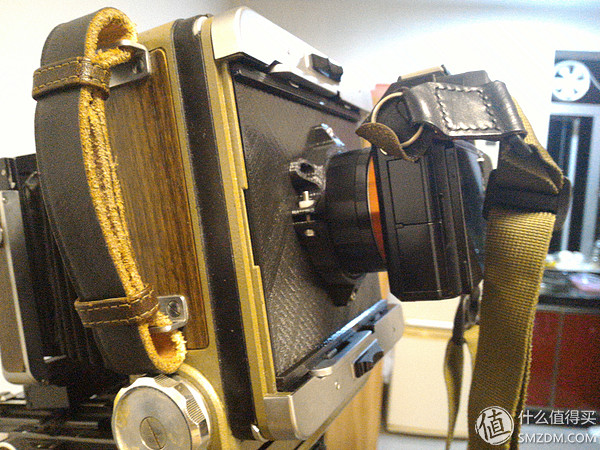
Inevitably, it's impossible to put vase vases or anything...
